Taking a break from media room posts. Today, we have another guest post from Eric about maintaining your A/C Unit.
-------------------------------------------------------------------
With the unusually hot weather in the southeast this summer, I thought it would be a good idea to do a quick check on my central A/C unit. There are several things you can look at when doing a quick check of your system but today I'm going to focus on the refrigerant line going to your compressor.
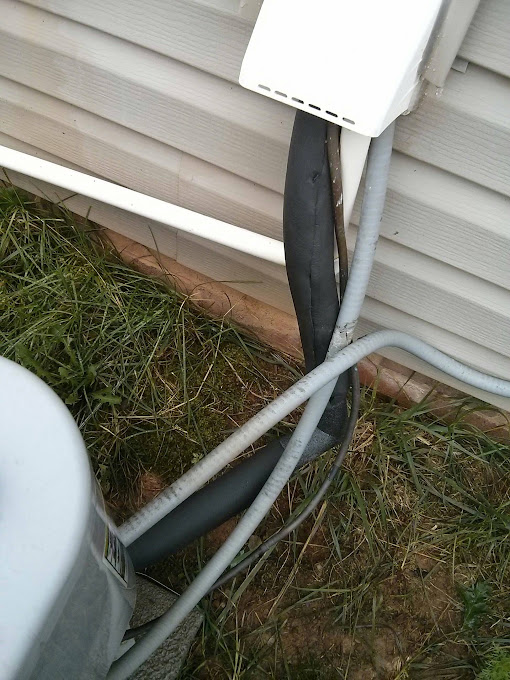
Central air conditioning systems operate by circulating coolant through an indoor coil (i.e. the evaporator coil) which absorbs heat and moisture from the hot nasty air insider. The refrigerant then flows outside to the condenser coil where heat is released through radiator fins. The cold coolant then flows back indoors where it absorbs all the heat from inside your house. For you nerds out there, it is nothing more than a heat exchange unit that utilizes the heat capacity of coolant and the high surface areas of evaporator coils and radiator fins to maximize heat exchange. Therefore, you can see why it would be important that the cold coolant line flowing back into the house be well insulated so it is as cold as possible. This is how mine looked the other day (the black line is the refrigerant line):
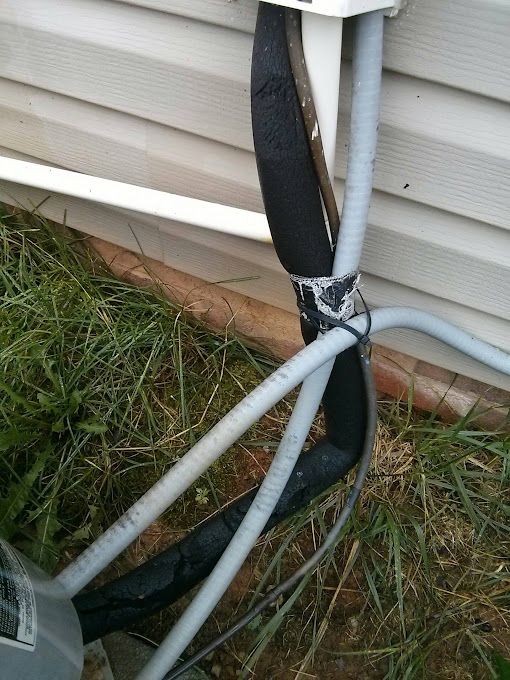
Pretty bad right? Portions of the insulation have split altogether and exposed the piping underneath. Overall, the material is cracked and deteriorated from baking in the North Carolina sun for who knows how long. Also, I'm not sure why all those lines are tied together with a combination of gaffer tape and tie wraps. That's just ugly and unnecessary.
Before you start, peel back a little of the refrigerant line so you know the diameter of the piping. Buy the right insulation for your piping. I think mine was 7/8" or something.
First, turn off the air conditioning unit at the breaker or the thermostat. It isn't too important because we aren't going near any moving parts but we want the refrigerant line to come up to ambient temperature so no condensation forms during the next step, which is removing the old insulation. Cut it all off. Throw it out. Look how nasty it is. Gross.
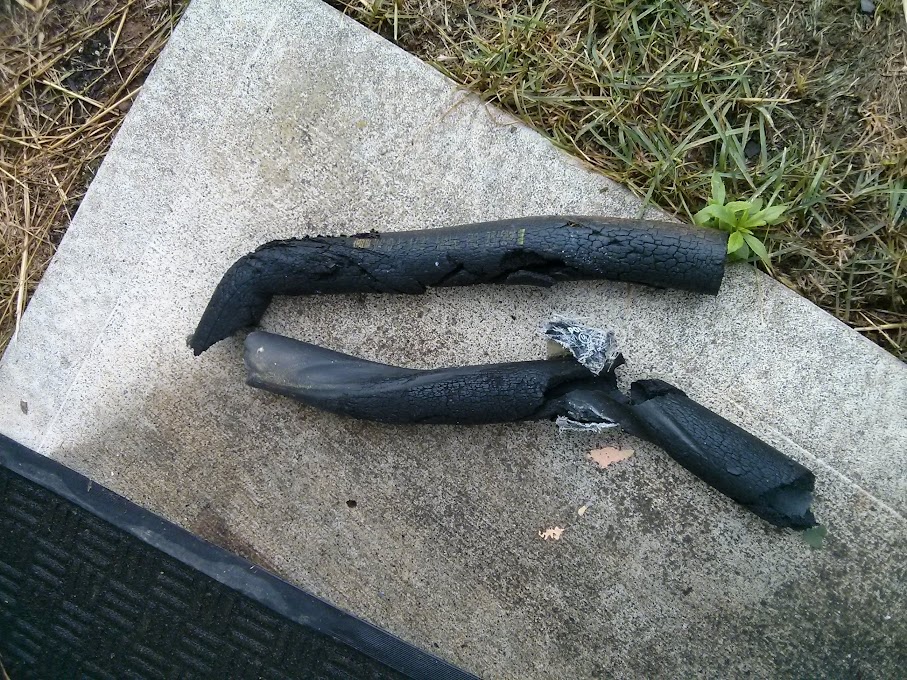
Clean your refrigerant line off and make sure it is dry. If you install new insulation over a wet line, you'll trap moisture inside and hasten deterioration of the insulation. Next, put on the foam elbows at any bends in your piping. At hardware stores, you can find these elbow joints for a few dollars. This one cost $3 which sounds pricey for a small piece of foam but they are worth it! Trying to bend a tube of foam into a right angle is futile but these little pieces fit perfectly!
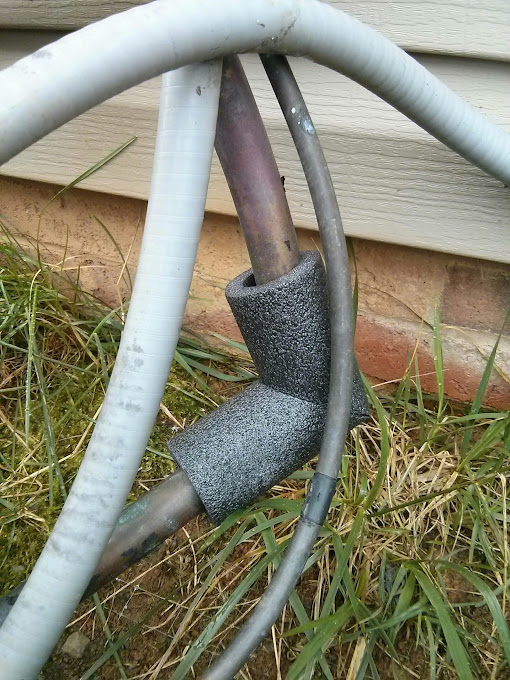
Next, measure your lengths of piping and cut your new insulation to fit. For lines running parallel to the ground, install them with the seams facing down. This is important because any moisture that accumulates inside the insulation can then drip down through the seam. Trapped moisture is your enemy here.
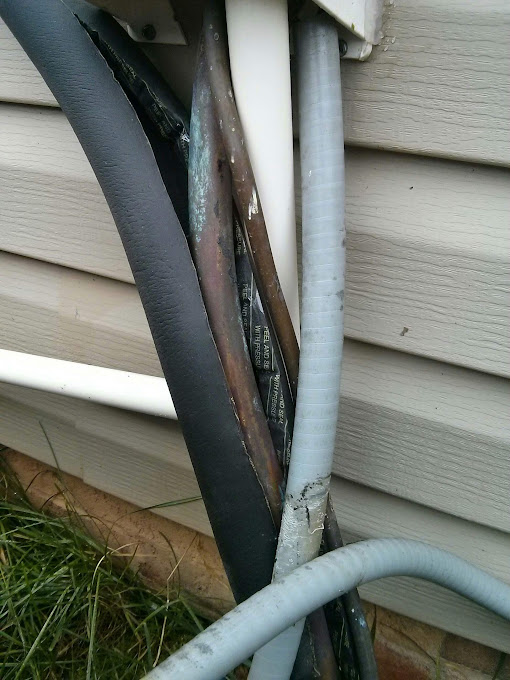
Things got tricky here with the suction, condensate, and piping lines all joining. Use some elbow grease to fit that tubing over and then remove the plastic covering the adhesive. Hopefully, your builders did a better job than mine. This is just ugly.
There, all done. Something is missing right? It doesn't make sense to have black insulating foam bake in the sun, exposed to the elements, etc. I decided to wrap the insulated line in reflective tape being sure not to tape over the seams. I used normal foil tape that you can find at any hardware store.
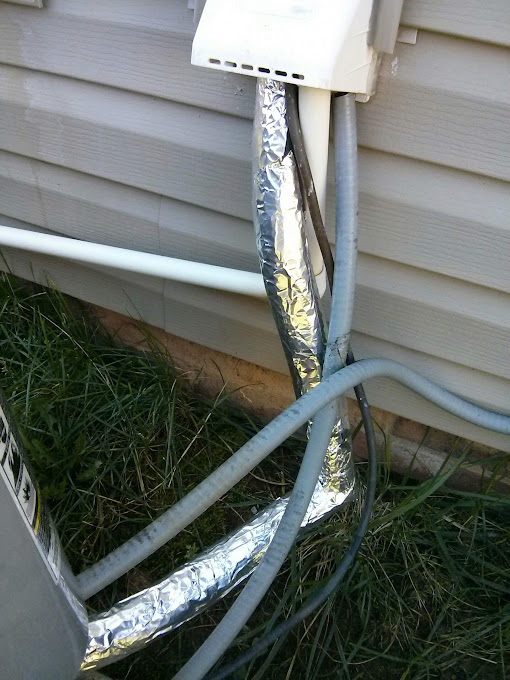
And that's it! This is a pretty easy and cheap DIY. 6 feet of insulating foam cost $6, the elbow was $3, and a 30 foot roll of foil tape was $4. Thanks Charles for letting me do this guest post.
No comments:
Post a Comment