Sunday, May 24, 2015

The Big Reveal


Not many posts from me the past few months because of baby and because of the media room project.  When we bought the house, it came with a prewired media room.  Too bad it was just an empty room with wires in the wall.

I wanted to set the room up without hiring out so I could learn some new skills.  I went with a 7.1 in-wall system with ceiling mounted projector  I've been working on this project off and on for the past 6 months, and it is finally complete.  In the picture above, you can see the screen, the two in-wall front speakers, the center speaker, sub, receiver, console, and Frozen.

I'll make more posts later about each mini-project in the media room.

Wednesday, May 6, 2015

Guest Post - Push Mower

Today's entry is a guest entry from Eric in NC about maintaining your push mower.
---------------------------------------------------

If your push reel mower isn't cutting the grass like it used to, one likely culprit is the blades not being properly set. Here's a quick way to check to see if this is the case. First, raise the height of the mower to the tallest setting. This makes getting at the blades easier:

You'll see here that the reel mower cuts grass like a pair of scissors. The rotary blades spin and come very nearly in contact with the stationary blade, where my finger is. Note that safety warning about not putting your hands inside this area, which is what I'm doing lol


First, push down on the rotary blades to simulate the cutting motion. You should feel no resistance and it should spin freely. If the rotary blades touch the stationary blades, you'll hear a metal on metal noise and this could be the reason why your mower is very difficult to push. If this happens, adjust the blades so that they are as close together without actually touching. 

If you find that your blades spin freely, take a strip of paper and position it in between the stationary and rotary blades like so:

Push down on the blades and the paper should be cut. Do this all alone the length of the stationary blade, being careful not to amputate your fingers.


If the paper does not get cut, you'll want to position the blades closer together. This is done different on each mower but what you'll be doing is adjust it little by little until the blades actually touch (you'll hear the noise when the rotary blade spins), and then back off the tiniest amount so that there's a tiny bit of space separating the two blades.


This is how it's done on my Fiskars mower. Now go out and enjoy your newly adjusted mower!

Monday, February 9, 2015

Ethernet Ports

One of the things that I wanted to do as I was setting up the home theater was to activate some of the ethernet ports around the house.  When our cable was installed, Verizon only activated one of the ports, so many of the ports (including the one in the theater) did not work.  I didn't take any pictures during the project, but I have some pictures of the end result.

Step One - Junction Box


Find the junction box in your home.  Most of the time, the box is located in your master closet or garage.  The picture above is our junction box in our master closet.  Sometimes the box will be installed onto the wall so it will look like an actual box.  Sometimes the box will be installed into the wall so it will look like a metal panel (as pictured above).

Step Two - Input Signal

Open the box or remove the metal panel.  This is what the inside of our junction box looked like after I was done hooking everything up.  The black/red thing at the bottom was the modem/router that Verizon provided.  Our junction box included an A/C outlet to power the modem/router.  I had to use an extension cord because the A/C adapter for the modem/router would not fit into the junction box if I plugged it directly into the A/C outlet.

The white wires running down the right side are the coax cables that run to the different coax ports throughout the house.  One of the coaxes is a line to the exterior cable box.  That coax is fed into a splitter that splits the cable signal into a TV cable signal and an Internet signal.  

The Internet signal is fed into the modem/router.

Step Three - Output Signal


The last step is to connect the ethernet ports throughout the house to the modem/router.  The junction box contains a box where all the ethernet ports connect to.  As you can see in the picture, the yellow CAT5 cables run from the various ethernet ports in the house to jumpers on the box.  These jumpers then connect to ethernet ports on the bottom of the box.  To activate the ports, I run CAT5 cables from these ethernet ports to the modem/router.

Notes
If your cable company provided only a modem rather than a modem/router combo, do not purchase a router to stick in the junction box with the modem.  That would take up a lot of space and cost more than you really should be paying.  Instead of buying the router, buy a switch or a repeater.  Switches are typically a much smaller form factor and cost much less than a router.  Connect the switch to the modem and then connect the ethernet ports on the switch to the ethernet ports on the box.  

You will probably need another router to establish a WiFi network throughout your house.  Luckily, I had one lying around.  It's a bit outdated, so I ordered a new router, which should come in the next few days.  In the meantime, my speeds are capped by the old router.


Sunday, May 18, 2014

Clogged Tubs

At some point, the drain on your bathtub may get clogged.  Usually, it's just hair and other small debris that's easy to remove.  No need for Drain-o or some contraption made from a wire hanger.  Drain-o is especially bad on your pipes, so do not use it on your own pipes ever.


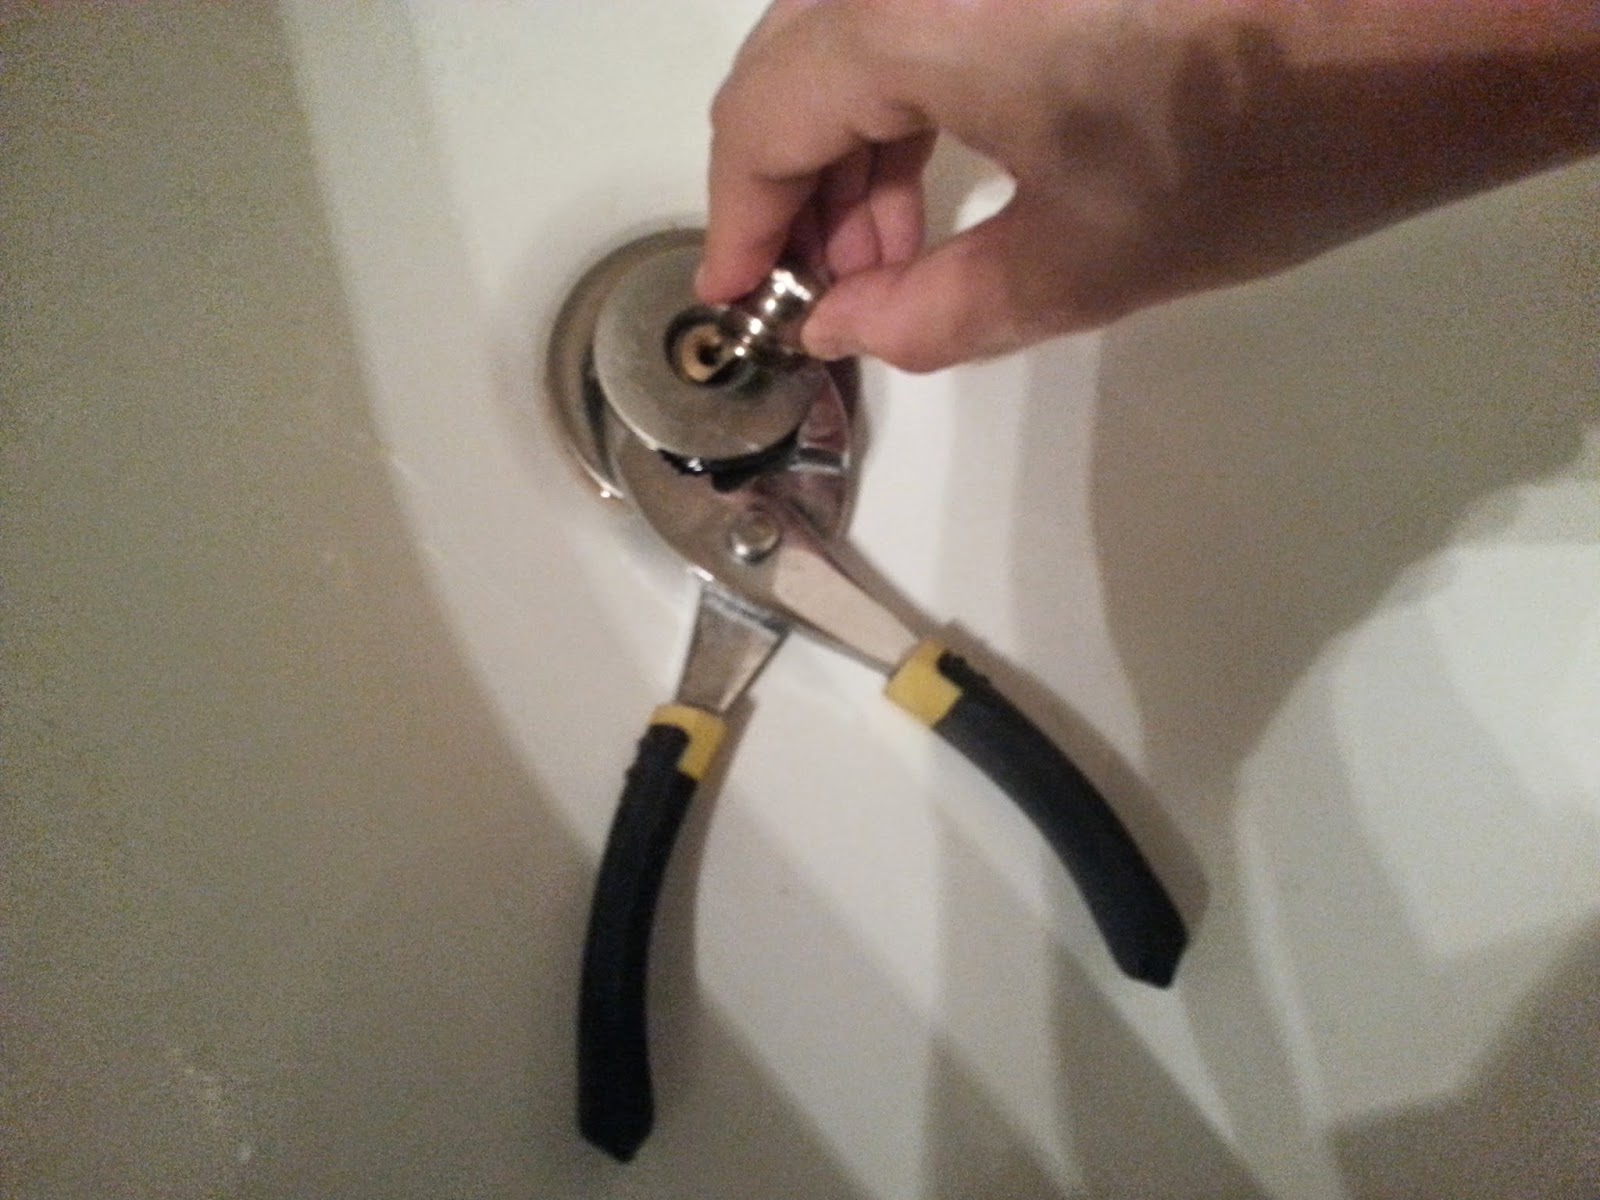
Here is the offending drain.  Looks normal, but drains very slowly.  A sure sign that hair is clogging it up.


Lock down the drain plug and twist off the center cap.  Underneath is a metal rod.


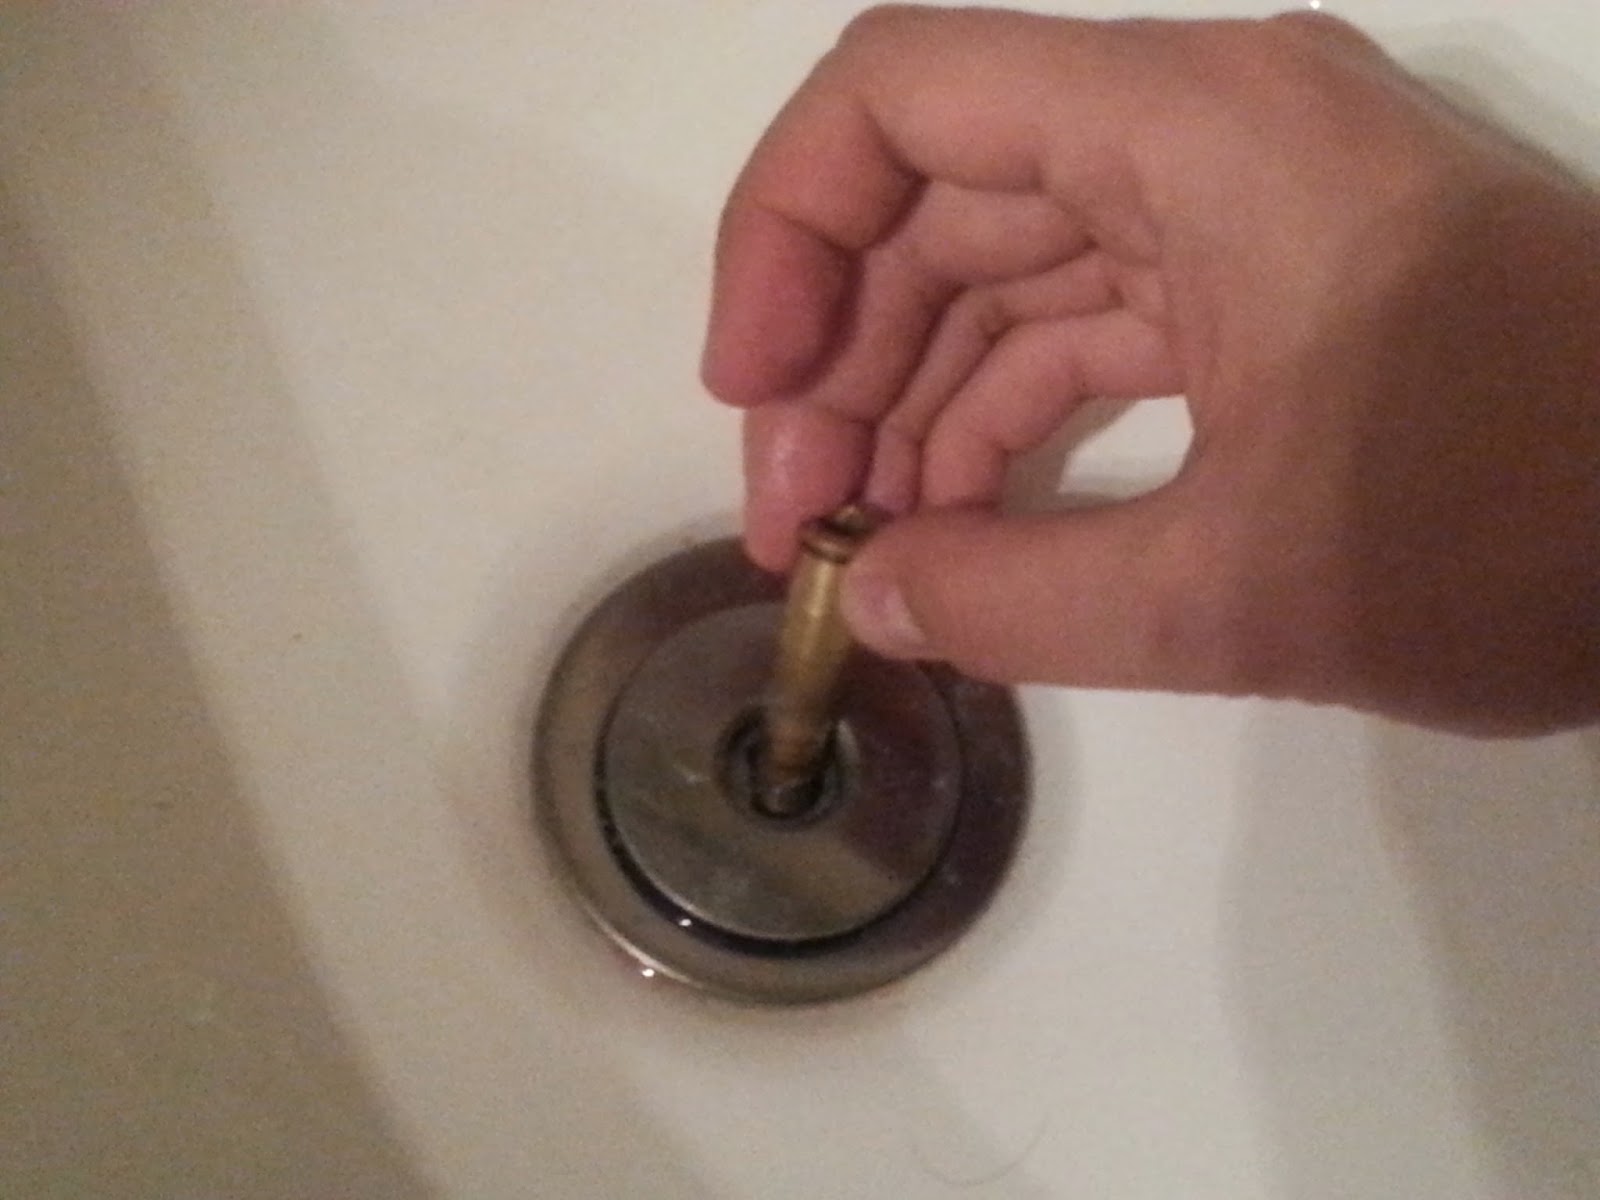
Unscrew and remove the metal rod.  The plug will now completely remove from the drain.

No pictures showing the hair or how it was unclogged.  It's not a pretty sight, so I'll save your eyes.  If you don't want to use your hands to remove the hair, try using a pair of needle-nose pliers.

NOTE 1: There is a metal ring that slides along the metal rod.  Do not make the silly mistake I did and lose it down the drain.  That ring is what keeps the plug from always being in the ON position.

NOTE 2: Some plugs do not follow this assembly.  They will attach to the metal rod with a screw.  The screw is located underneath the plug.  You'll have to use a flashlight and a screwdriver to locate and remove the screw.  Do not unscrew the screw all the way or you risk losing it down the drain.


Thursday, June 27, 2013

Guest Post - Humidifier

We've been busy unpacking and setting up our office, so no posts lately.  However, our good buddy Airiq has provided a guest post about cleaning humidifiers.
----------------------------

After winter has ended, it’s time to put away those humidifiers that helped you through the dry and cold months.  If you’re like me, your humidifier needs a thorough cleaning before storage.  Below are some tips on cleaning the Crane Drop Shape Ultrasonic Humidifiers
Cleaning the base of the humidifier is fairly straightforward.  You can soak the dirty parts in white vinegar/water as instructed by Crane’s staff in their instruction manual.  Use only a capful of white vinegar at most.  Let the base soak for about 15-30 minutes then rinse with water and use a paper towel to remove residual mold. 
Mold also grows in the water storage container and this is probably the most difficult part to clean.  While you can soak the storage container in white vinegar/water, it won’t remove the mold particles.  Something I read online is that by using rice, you can remove most of the mold growing on the walls.
Mix about ½ cup white rice with about 1 cup of water in the storage container.  Cap the container and shake vigorously.  As the rice swashes around, it knocks the mold around and cleans the walls.  After about a minute or two, empty the container and start again.  After 3 or 4 ‘cleanings’, your container should be clean.
Don’t forget to remove all the rice before storing the humidifier away for the summer!


Sunday, June 2, 2013

Man v. Plant Part 4

I decided to give some sprays a chance after realizing that pulling weeds would be a losing battle.  After spraying Bayer and Ortho branded sprays, most of the weeds have withered away.  However, the really annoying weed is standing strong.  I've been looking around online and can't seem to figure out what this weed is called.  One person suggested it was Cylindrica Imperata.  I see the resemblance, but it doesn't look exactly like it.

Any clue what this is?


Tuesday, May 14, 2013

Man v. Plant Part 3

We saw some ads about a weed pulling tool and decided to give it a try.  I'll give my impressions of the tool at the end.

Introducing the Fiskar Weed Puller.  It's the strange, orange contraption on the ground next to the hand shovel.  It has an orange handle, metal teeth, and a black lever.  It ran for about $25 at Lowe's so it's relatively inexpensive as far as tools go.  A suggestion to improve the tool would be to lengthen the handle as I do find that it is pretty short for a person my height.

To operate, you stick the metal teeth into the heart of a weed brush, like so.  You can step on the black lever to push the teeth deeper into the ground.  After the teeth are lodged into the ground, you pull the handle in the direction of the black lever.  The teeth will clamp around the root system of the weed (in theory) and your pulling motion will pull the entire root system out of the ground. 

Here is the end result.  You'll notice that it pulls up a lot of dirt along with the roots.  This will leave a noticeable hole in the ground, but you can always shake off the roots and replace the dirt if you want to.  Also, the orange portion of the handle in the bottom right corner of the picture is actually a mechanism that you an use to push the weeds out of the teeth after they have been pulled.  Just like a pump shotty.  Pump and you're ready to go again.

Final impressions: The tool is good for pulling weeds that grow in patches or bushes.  It is not so good at pulling weeds that grow in stalks.  The reason is because it is harder to target the teeth to pull out a stalky weed than it is to target a bushy or patchy weed. 

Another problem occurs if you have a sprinkler or drip system installed in your lawn.  Weeds often congregate around your sprinkler or drip pipes because that is where the most moisture is.  If you find that to be the case, be careful while using the weed puller.  The teeth aren't sharp so they won't cut your pipe, but they are strong enough to latch on and pull up your sprinkler pipe if you're not careful.  

Overall, the weed puller would be great if my weeds were more patchy or bushy rather than stalky, and if I didn't have a sprinkler system.  Definitely check out the type of weeds you have and their locations before deciding whether to buy this tool.